User and Users Groups
Campaign-only users
For Campaign-only users, meaning you don't have the Selligent solution at all, user configuration is fully done inside the Configuration section of Campaign.
Users & Users Groups management defines user access to Campaign components and objects for individual users and groups of users.
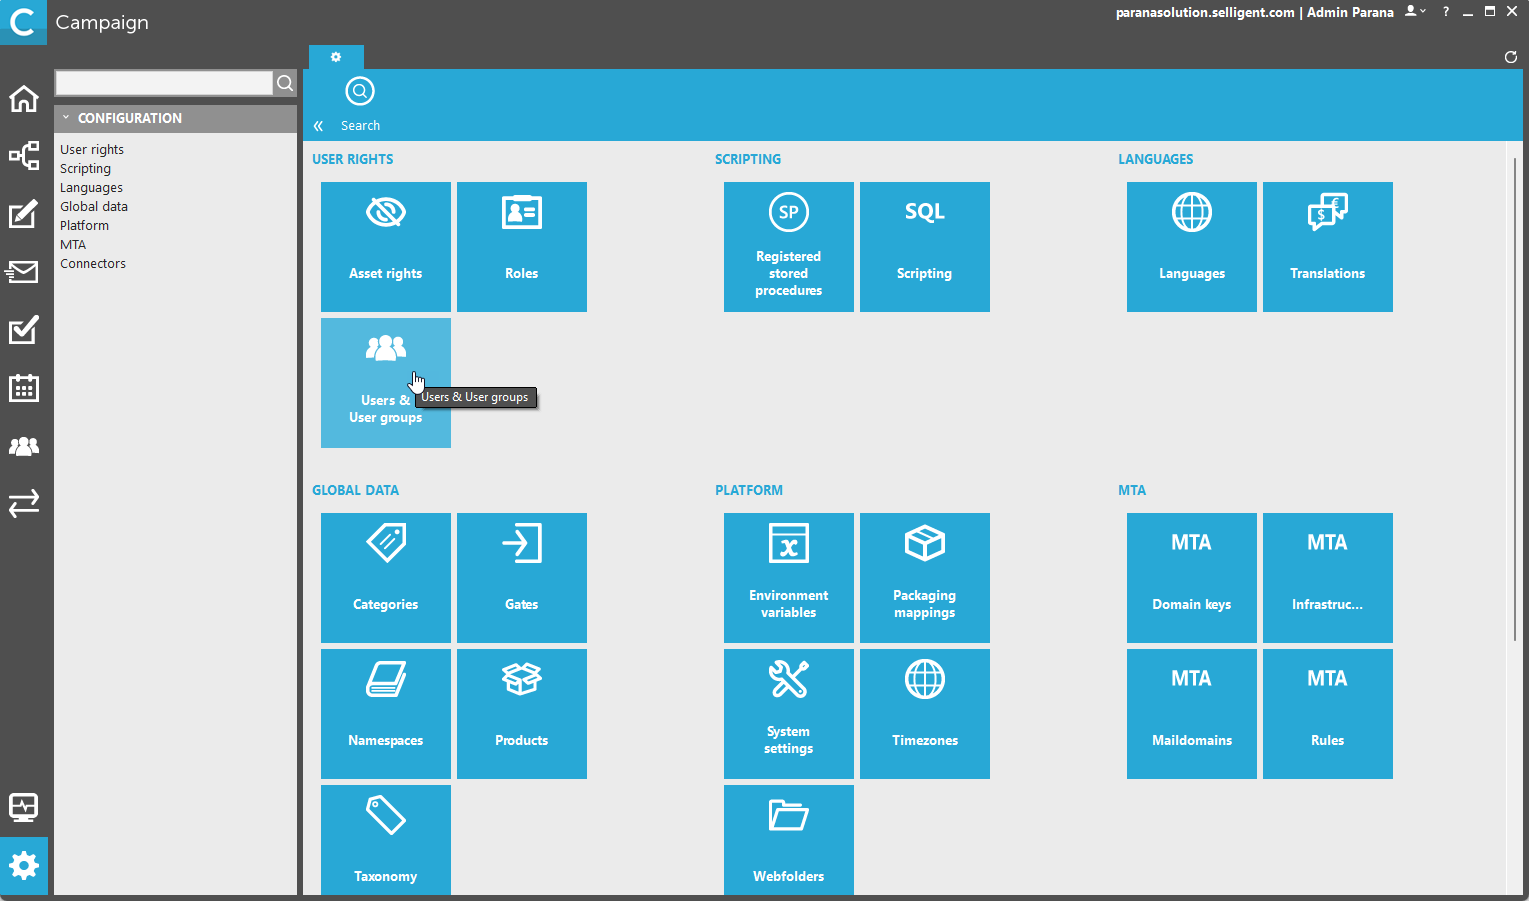
The User Management main section is divided in two parts:
- User Groups (top)
- Users (bottom)

A User Management toolbar is available at the top with the following options:

- New user — creates a new user from scratch.
- New REST API user — creates a user used by the REST API.
- Delete user — deletes the selected user. The icon is only available when a user has been selected.
- User properties — provides access to the access rights and other properties of the selected user. The icon is only available when a user has been selected.
- New group — creates a new group.
- Delete group — deletes the selected group and all users within.
- Group Properties — displays the properties of the selected group.
Creating a new group
A user group contains a number of users. When creating a new user group, the Group properties need to be filled out:
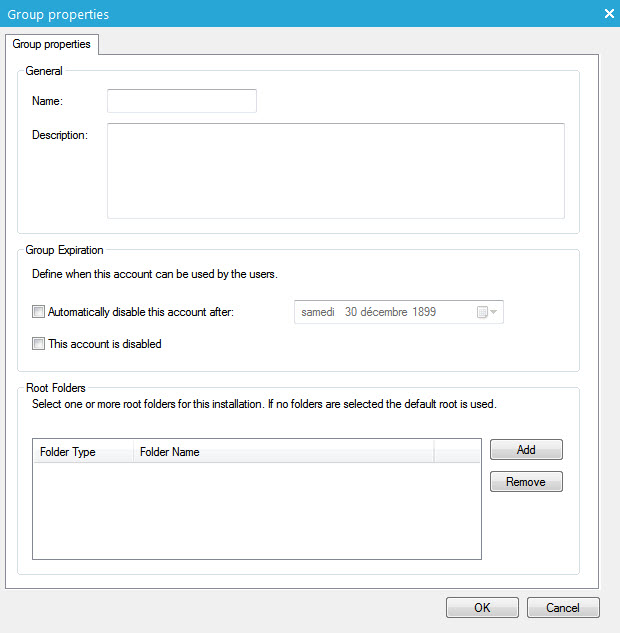
- Name — User Group name.
- Description — User Group description.
- Automatically disable the account after — Account expiration date.
- Disabled — Account deactivation.
- Root Folders — Folders accessible by the User Group (Lists & Journeys). This corresponds to what is defined in Asset Rights. Use the 'Add' button to add new folders to which the group has access.
Creating a new user
When a new user is created, the following properties need to be defined:
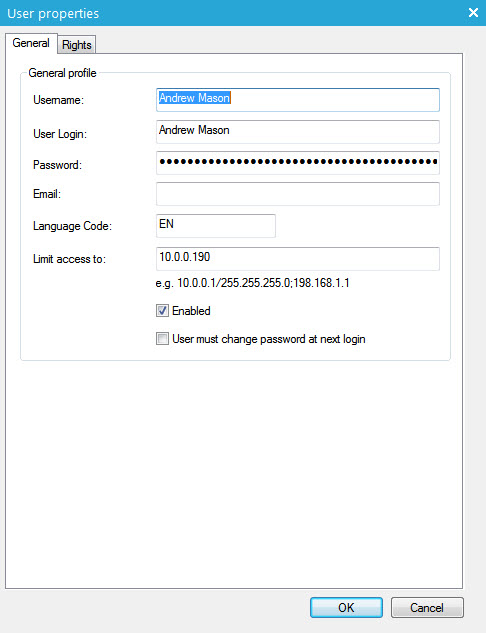
- Name — User name
- Login — User login name
- Password — User password
- Email — User email address
- Language code — User language in which Campaign will be used.
- Limit access to — limits the user's access to only specific domains. This option is only used for API accounts. Only the listed IPs will be able to connect with the API through the API user.
In order to activate the new user's profile, check the 'Enabled' box.
Important Note: Strong security policies are enforced for the password field, it has to be constituted of at least one character in uppercase, one character in lowercase, one digit, one specific character (@, #, !, …) and has to be at least eight characters long. These rules cannot be overridden to avoid security breach within the Selligent platform.
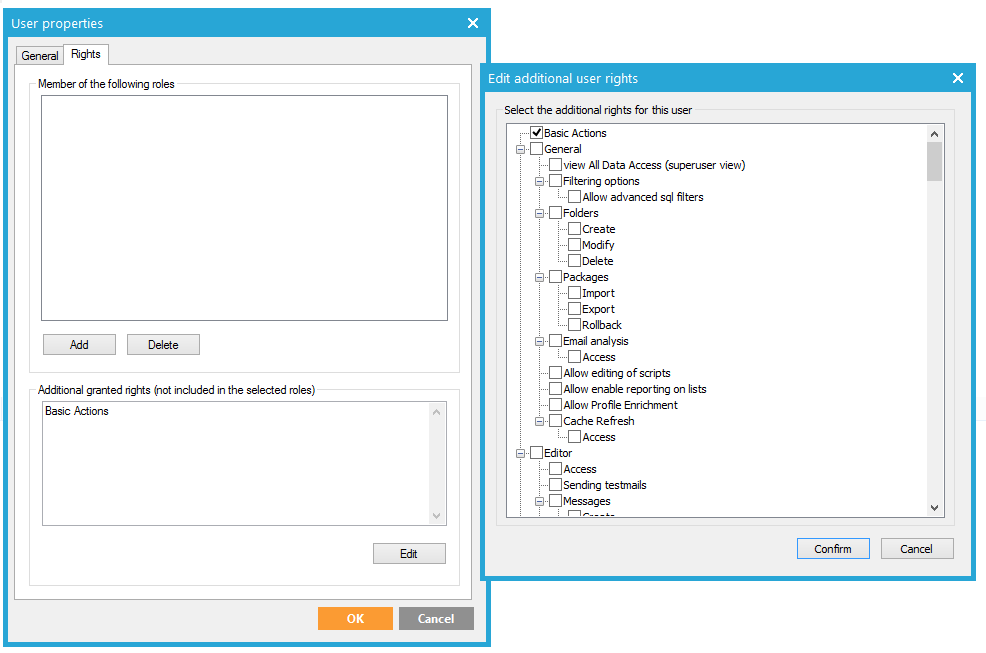
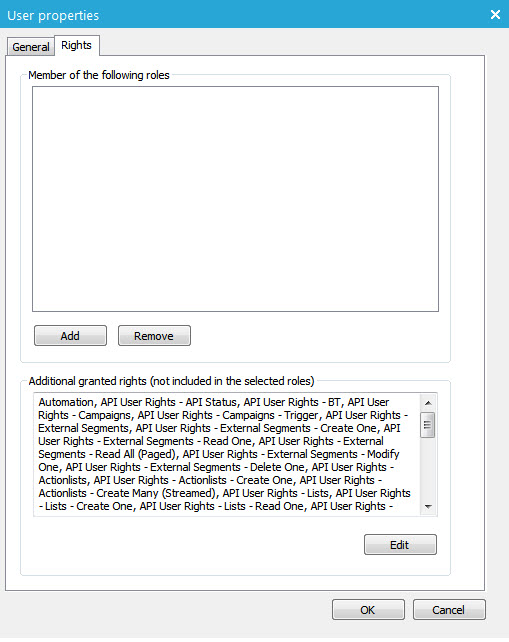
Next, the user rights need to be defined. Click the 'Rights' tab to configure the access rights.

The upper part allows adding/removing multiple roles to the user by using the corresponding buttons.
The lower part allows the customization of each access right. Click the 'Edit' button to launch the tree view containing all available rights.
Creating a new API user
The existence of an API user is required when using the Selligent APIs to access and interact with Campaign. The following options are available from the 'General' tab:
- Name — The name of the API user.
- Login — The login of the API user.
- Password — The password is generated automatically and is used for hashing. The 'Refresh' button to the right of the password field allows regenerating the password.
API specific user rights are assigned on the 'Rights' tab:
The API user must be assigned specific rights, indicating what operations can be performed through the API by that user and what operations can't.
Additionally, it is possible to activate cantor pairing of ids. This allows generating one id for each user based on the user id and the list id. This allows masking ids for the outside world.
Hybrid Users (Configuration in Selligent)
For hybrid users, meaning you have both Selligent and Campaign, user configuration is done in Selligent.
In the Admin Configuration section of Selligent, navigate to Access Management / Users to see all users created in Selligent.
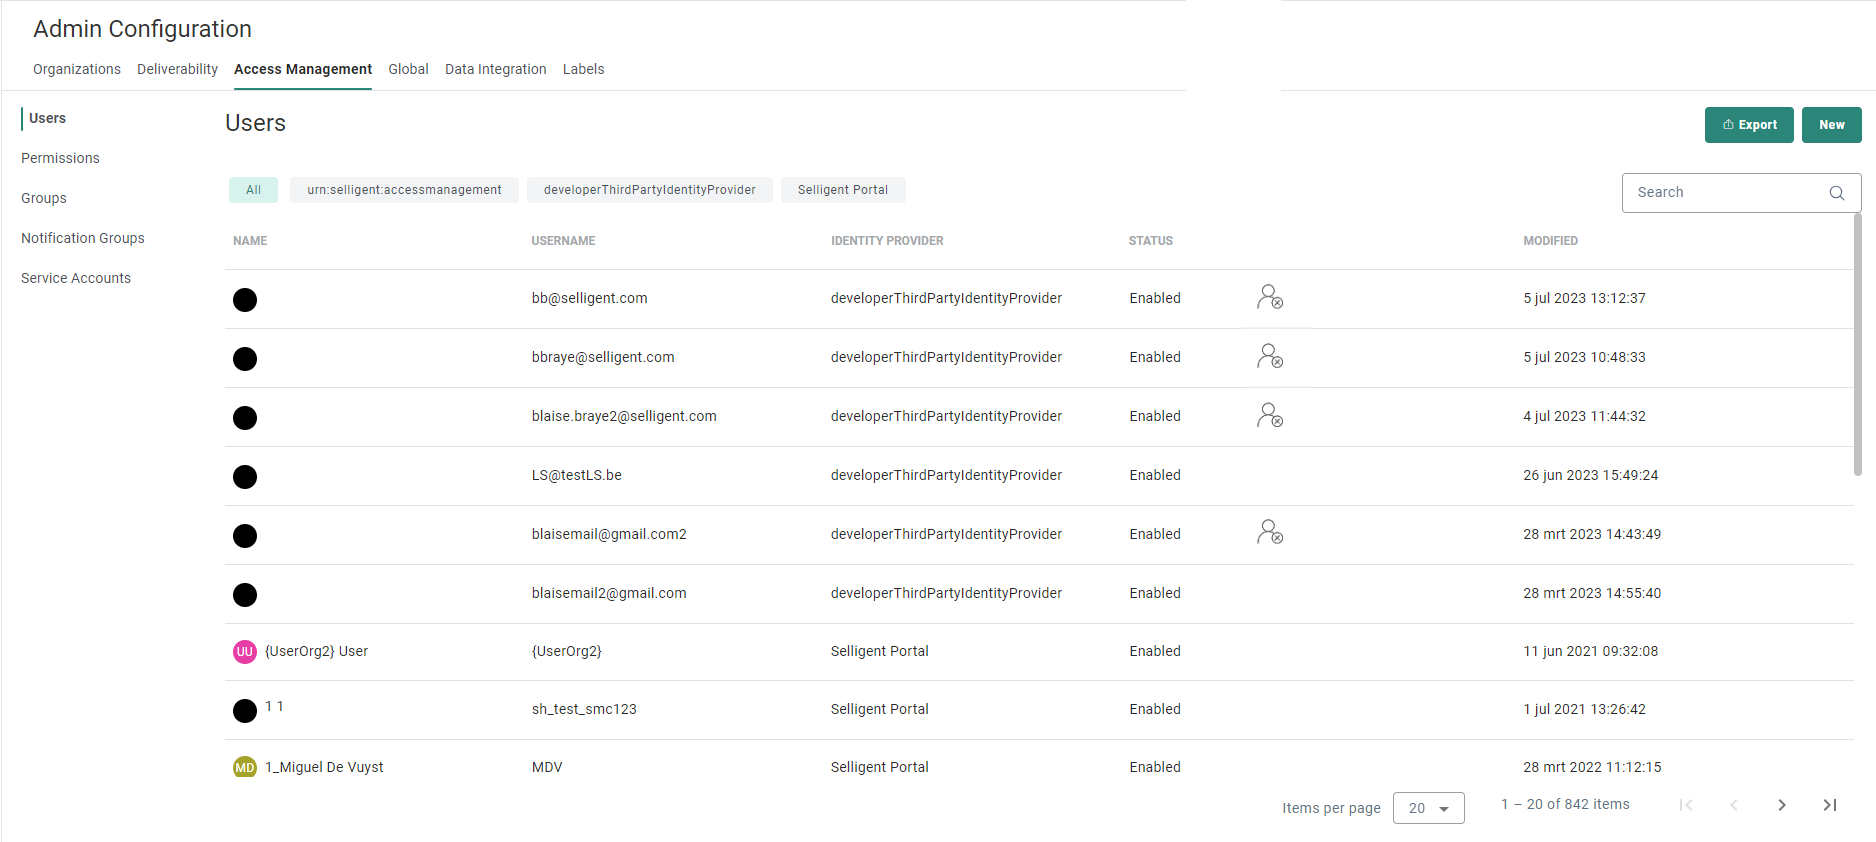
When an external identity provider is used, the Users tab will also include the users from that IDP.

For each user, the overview provides information on Two Factor authentication and if the user is enabled. If the user has an icon in the Two Factor authentication column, it indicates that this user has not yet passed the authentication procedure. Users without an icon in this column have passed successfully.

All users are listed alphabetically. A checkbox in front of each user allows selection of multiple users at a time to delete them.
Clicking a user in the list opens the Properties panel on the right where you can modify general user properties and permissions.
The Search field at the top allows searching in the list of users based on name and first name. The Filter button lets you filter the users based on the Identity Provider.
Users migrated from Campaign to Selligent
For customers
migrating from Campaign to Selligent, all their users and
their permission sets are migrated to Selligent.
These users
have permissions assigned that correspond to their current roles in Campaign.
Their permissions are automatically set for all Business units.
Users that have the right to modify user rights in Campaign will automatically
be System Administrators in Selligent.
Note: When a user account is created in Selligent by Zeta, it's automatically synchronized to Campaign.
By default, the user only has access to Selligent by Zeta.
When trying to access the Campaign module with a user created in Selligent by Zeta, by default the following error appears : 'Unable to decode the launch string [OPTILAUNCH=]'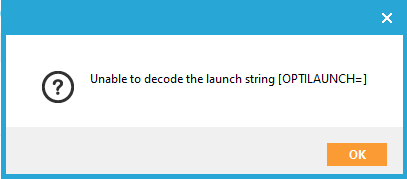
To be able to access and use Campaign with a user created in Selligent by Zeta, a Campaign admin user needs to perform the following steps (get in touch with your Selligent contact if you don't have a Campaign admin account) :
1. By default, a new Selligent by Zeta user is in the User Group 'NEW Engagement Sphere users' (in the Configuration section of Campaign).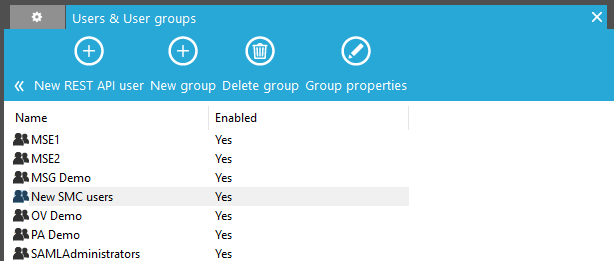
2. If you want the user to be able to access and work with Campaign too, you need to move (drag and drop) the user to the 'Administrators' group.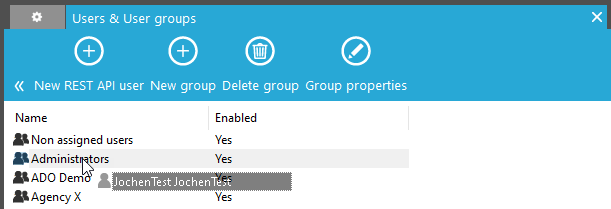
3. Keep in mind that the user also has no Campaign user rights defined by default.
This can be done by selecting the user to show its properties, choosing the Rights tab and editing the rights/roles.